Blog

|
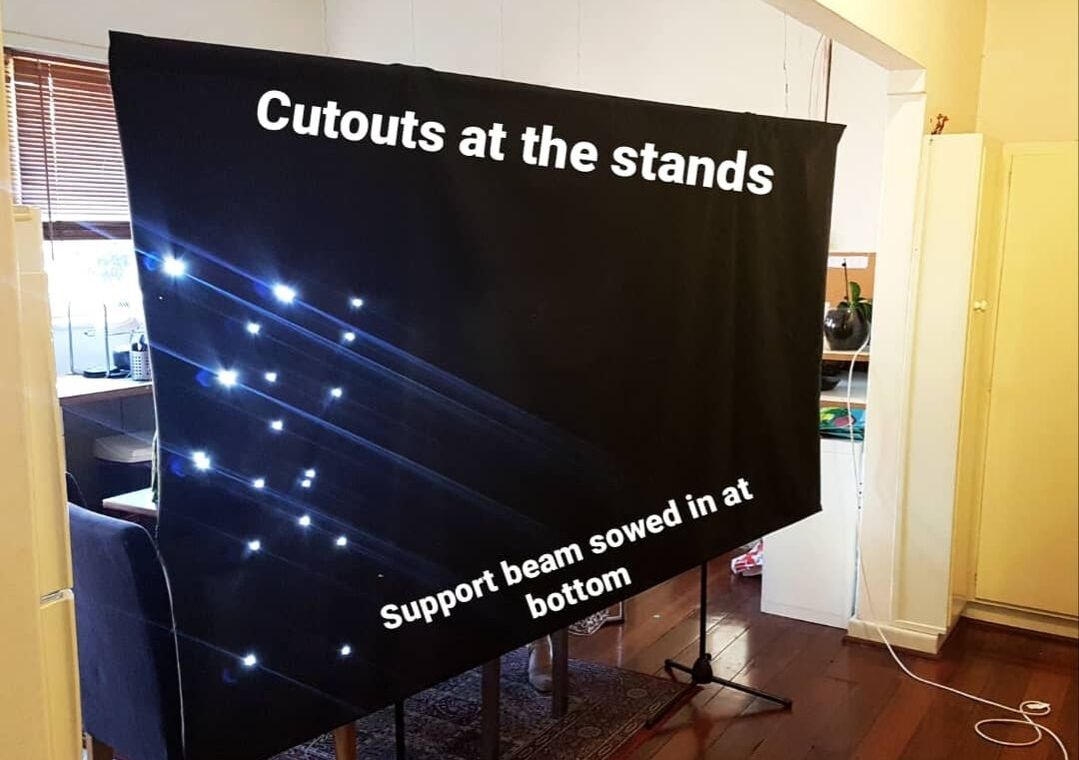
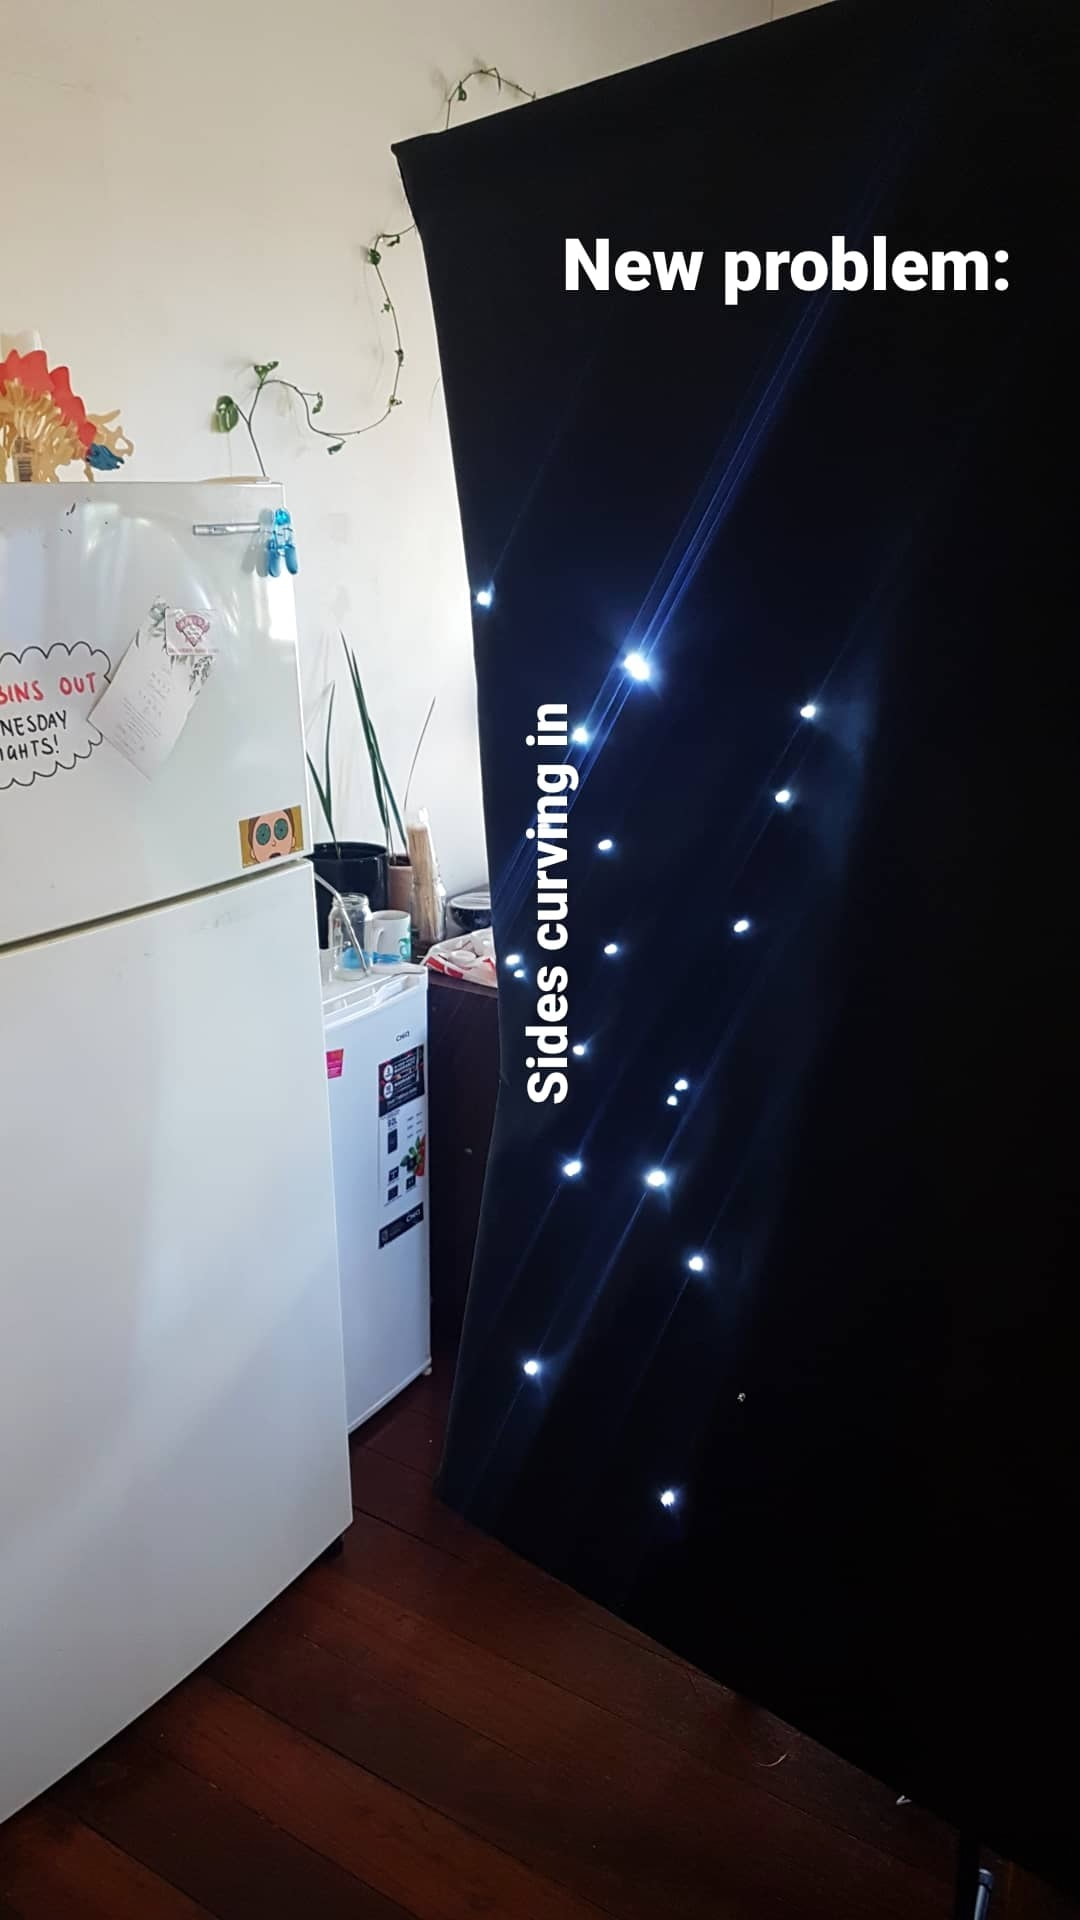
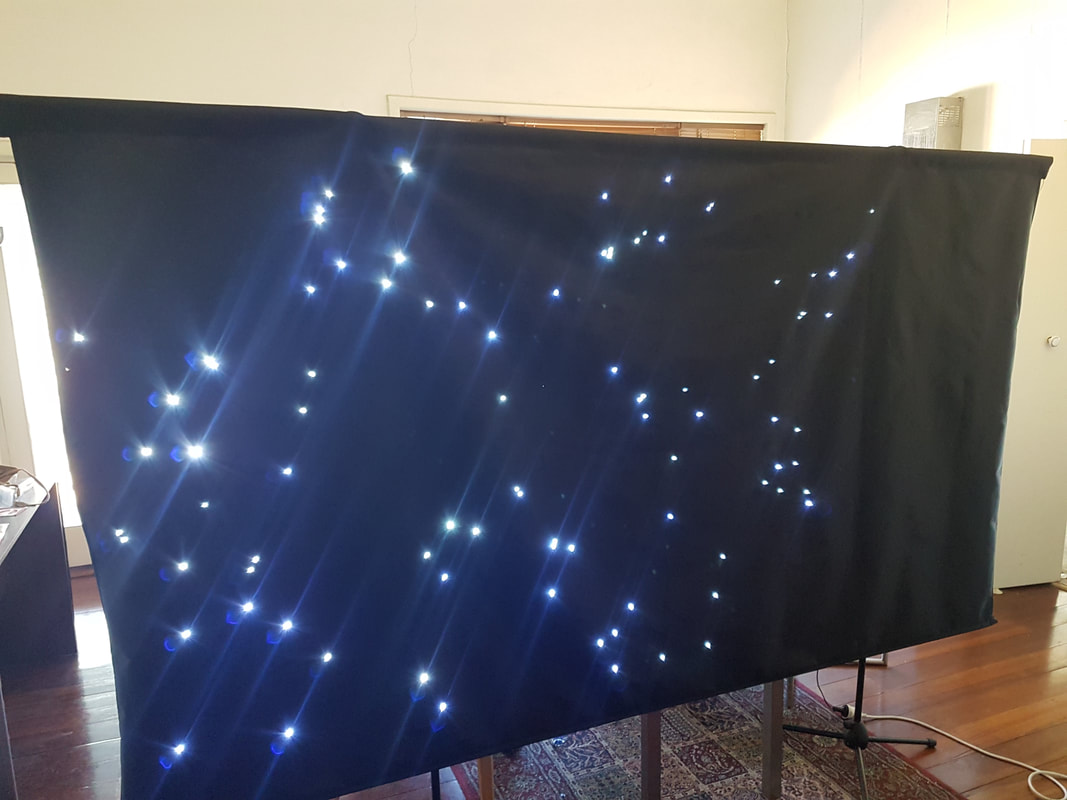
The approach i often find myself taking when designing a new idea, is to take the idea and just start building without a clear plan or structure to follow, because often the best insight on better design comes through identifying problems in the process of building. For the star sheet certain infilstructure was already in place when i started. I already had a working arduino code which was tested on a bread board with LED's, and creating a max patch was easy work since I've already done similar patches for different projects. The real problem I faced with this project has more to do with using materials that I'm unfamiliar with (such as nylon sheet), and doing tasks that i lack skill in (sewing). So to start off with, i purchased a large amount of cheap black nylon material and started thinking about how i was going to bring this idea into reality. This nylon sheet had a curtain-like texture, and was slightly shiny on one side, and darker on the other. All i really knew at this stage was that i was going to need a lot of white LED's, meters of wire, and lots of time to complete the project. Then I tested to see if the LED's were going to work hanging off a nylon sheet. I pushed each diode of multiple LED's throught the sheet like a needle through thread, then separatated the diodes out so the lights orientation was facing outwards from the sheet on the other side. I soldered them up and ran a current through them. Everything appeared to be working fine, so I knew i could continue forward without stressing about the material being conductive. I tested the lights on both sides of the sheet to figure out which side would look the best. I made my decision and continued moving forwards. Soldering in the LED's prooved to be incredibly time consuming. Taking care of the diodes as i push them through the material was a great deal harder than i originally anticipated. The material was thick, so the diodes would often bend as i was trying to push them through. But before i got too carried away with the LED's i needed to figure out how I was going to hang the sheet. My idea was to create a support beam at the top that would ensure that the material was hanging nice and flat so all the lights are emitting light toward the audence (if the sheet warps then the lights will point in all sorts of directions). 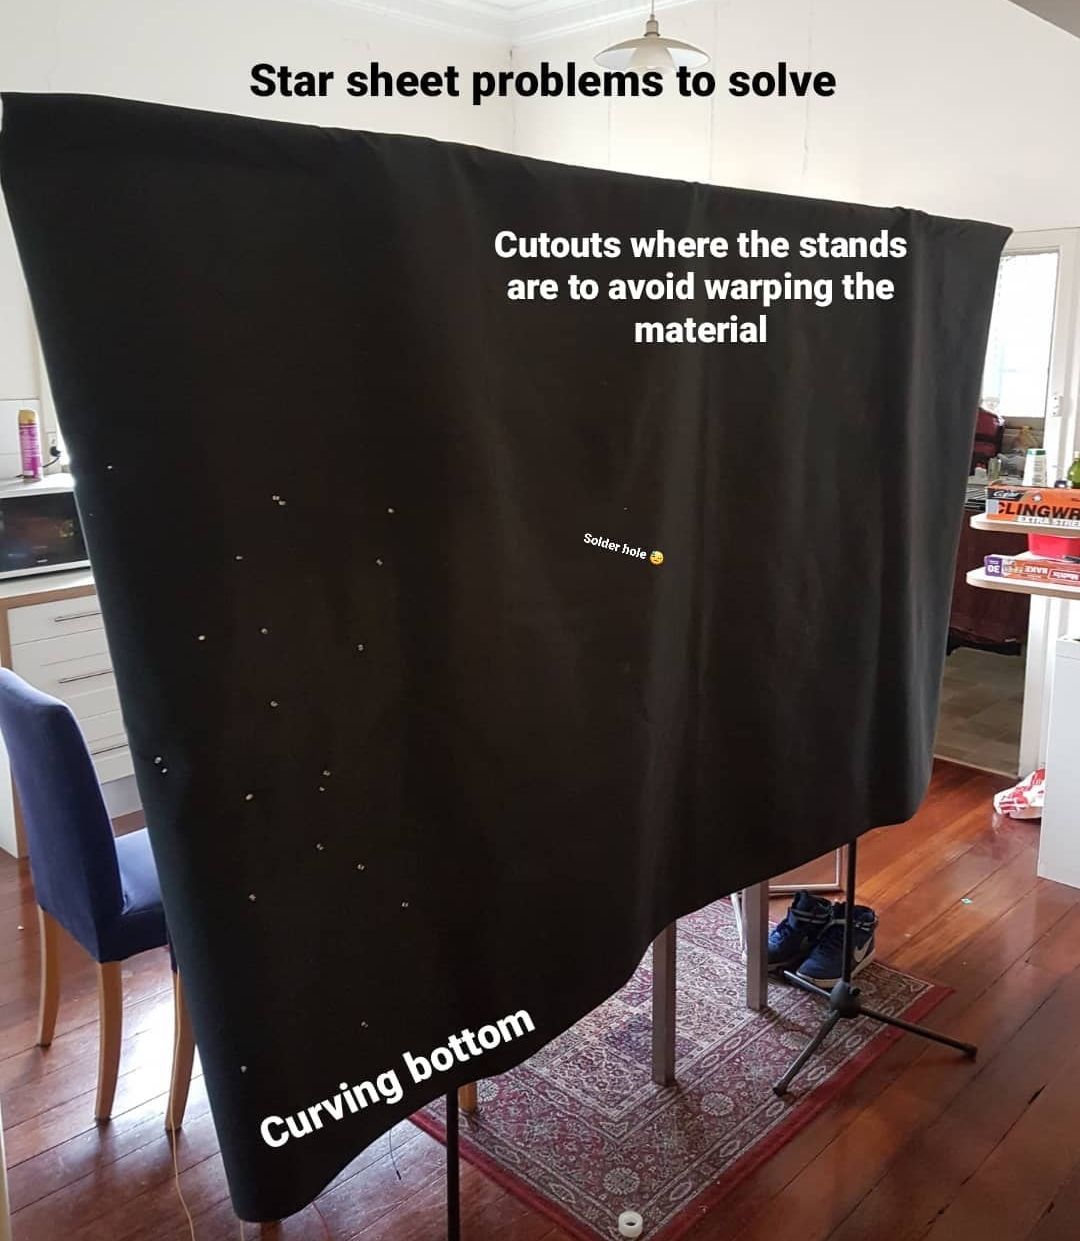 The picture above was taken just after i had sewn in the top support beam. Before i reached this point in the process, i had assumed that the weight on the material might be enough to hold it down straight, but soon realized after hanging it that more work would need to be done to ensure that the sheet would be a nice flat plane. Here you can see that the material curves and warps at the bottom and in two spots where I've connected the stands on. i also noticed that the material was warping slightly because my stiching wasn't straight enough at the top the first time around. So i restitched the top and inserted another support beam at the bottom and made cutouts 60cm in from each side for the stands.
Wire management and arduino placement.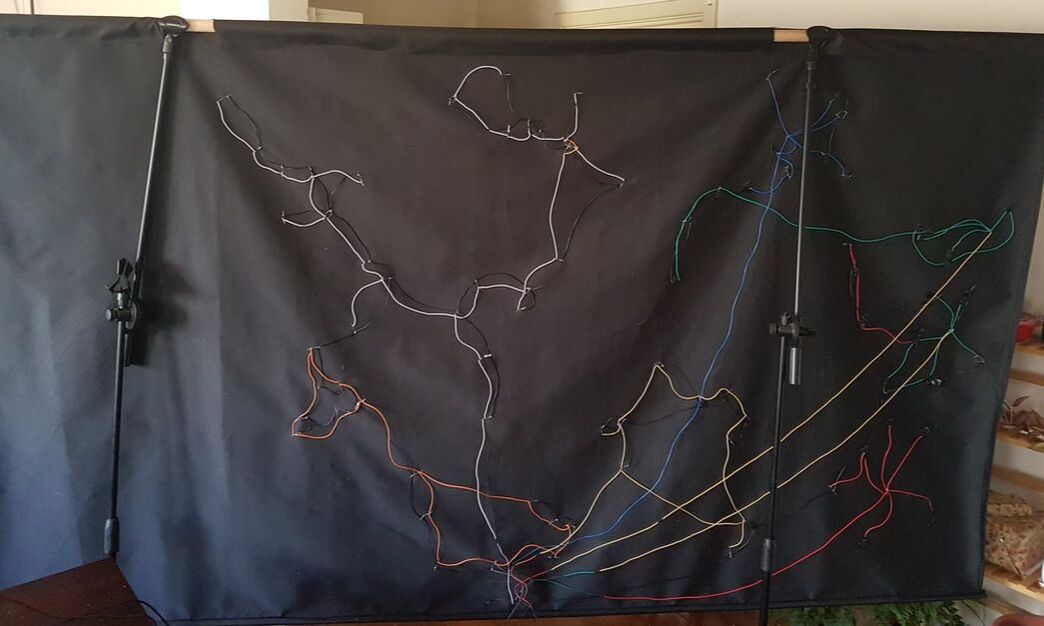 Where is the best place to sew in my arduino?
Thinking logistically, the best place for it is at the top or bottom of the sheet somewhere to avoid adding weight in a place that is vulnerable to warping the sheet with the weight. If i place it on the left or right, it might be possible to place the sheet to my left or right during the performance and disguise the USB cable connecting it. However, to do this will require a larger amount of patching cable because the lights on the opposite side of the arduino will be so far away. If i place it in the middle, the best place for the sheet would be behind me as i perform. The USB cable can hang down and under the sheet and connect to my laptop. If i end up deciding that i dont want to send messages to the arduino, i could sew the arduino in the middle, but it will require a power source aswell. This would be ideal if i decide that the effect of highlighting different channels isn't as effective as i originally thought it to be. The downside would be that a significant amount of weight would be added with the battery pack. What is the best way to manage the wires so they're neat and dont short? For starters, this project is likely to short at some stage. the diodes on the LED's are completely exposed, so if they bend and connect positive to negative, then i could short out entire constilations. I thought of using heat shrink, but it's not really ideal because the diodes often have multiple connections, and i would need to cut the heat shrink to get it passed to connections. I could wrap the diodes with electrical tape (similar to what i did on the spider LED) but this will be hugely time consuming, and it would look messy on the opposite side. I could sew in the diodes so that they have restricted movement, and while this would be the most time consuming option, it would ensure that the LED's remain in their correct orientation. The other downside is that in may be possible to see the thread for each sewn spot with a close inspection of the sheet (not a huge issue since the audience is so far away). In terms of wire management: i could feed the wire directly to where the bottom support beam has been inserted and feed the wire along the support beam. This would require a large amount of cable because instead of feeding the wires straight to the arduino, they'd have to come all the way down first and then accross to the arduino. A better solution might be to sew the wires in so that they remain in their positions for easy patching when setting up. I think i'll use electrical tape on the diodes to stop them shorting, and sew in the wires nice and close to where-ever i place my arduino for easy patching and setup.
0 Comments
|
AuthorMy name is Daniel Ohm and this section will include my research into music theory, experimental ideas, Mixing techniques and lessons learned from creative forums and musical endeavors. Archives
September 2022
Categories |
 RSS Feed
